Delta-v is a fancy term that means change in velocity, or more crudely, "how far your rocket can go." It's most often measured in either meters per second (m/s) or sometimes kilometers per second (km/s) if the value is large enough. As you might have guessed, this is a very important concept to understand if you want to build a rocket to get to a specific place.
If you want to go to the Mun and back, 7200m/s of dv is a good number to aim for, and gives you plenty of room for error. It's technically possible for around 6,000m/s. You can technically get by with as little as about 6000m/s, if you're good at it. If you only want to get to orbit around Kerbin, you only need about 4000m/s at most, and the some of the most efficient launches have reportedly gotten below 3000m/s of delta-v. An interesting side note is that it takes roughly a 9300m/s potential change in velocity to reach orbit around Earth. This is more than it takes for a complete round trip to Duna.
So you're probably wondering now, "How do I calculate this dv thing?" The answer is fairly simple, but might look a little scary if you aren't too good with math:
dv = 9.81 x Isp x ln(M/m)
Dv, also known as delta-v, is the number you want. 9.81 is a conversion factor used when your Isp is given in seconds (which it is in KSP). ln is "natural log" and you don't need to worry about that too much. Just accept that you have to plug that into the equation as a thing. M is how much mass your ship has with all of its fuel on board, and m is how much fuel your ship has with no fuel on board.
If you'd like to know more about logarithms (it's really not necessary for this), check out this website.
Let's try an example:
Total mass (M): 50 tons
Dry mass (m): 35 tons
Specific Impulse (Isp): 320
You can check these numbers in the VAB by using the Engineer's Report button in the lower right corner. It's orange, and looks like a cross between a gear and a wrench. You can drain fuel tanks by right clicking on them, and then left clicking on the green fuel bars. This is the easiest way to see your ship's mass with and without fuel. Be careful though. With tiny probes, these numbers aren't quite precise enough, and you could end up being several thousand dv off from what you think you have.
You have to do this for each stage of your rocket that has an engine.
If your rocket has 3 different engines on separate stages, then you have to do this 3 times. Make sure you treat the fuel above the stage you're working on as part of the payload, otherwise you'll get ridiculously higher numbers than you should. Let's try an example of this:
Once you've solved that last problem, you should understand delta-v enough to figure it out on your own. Good luck!
Maneuvers
Orbital mechanics are fairly simple in KSP, but are still a little counterintuitive. And by a little, I mean that basically everything you should do sounds a little wrong until you try it.
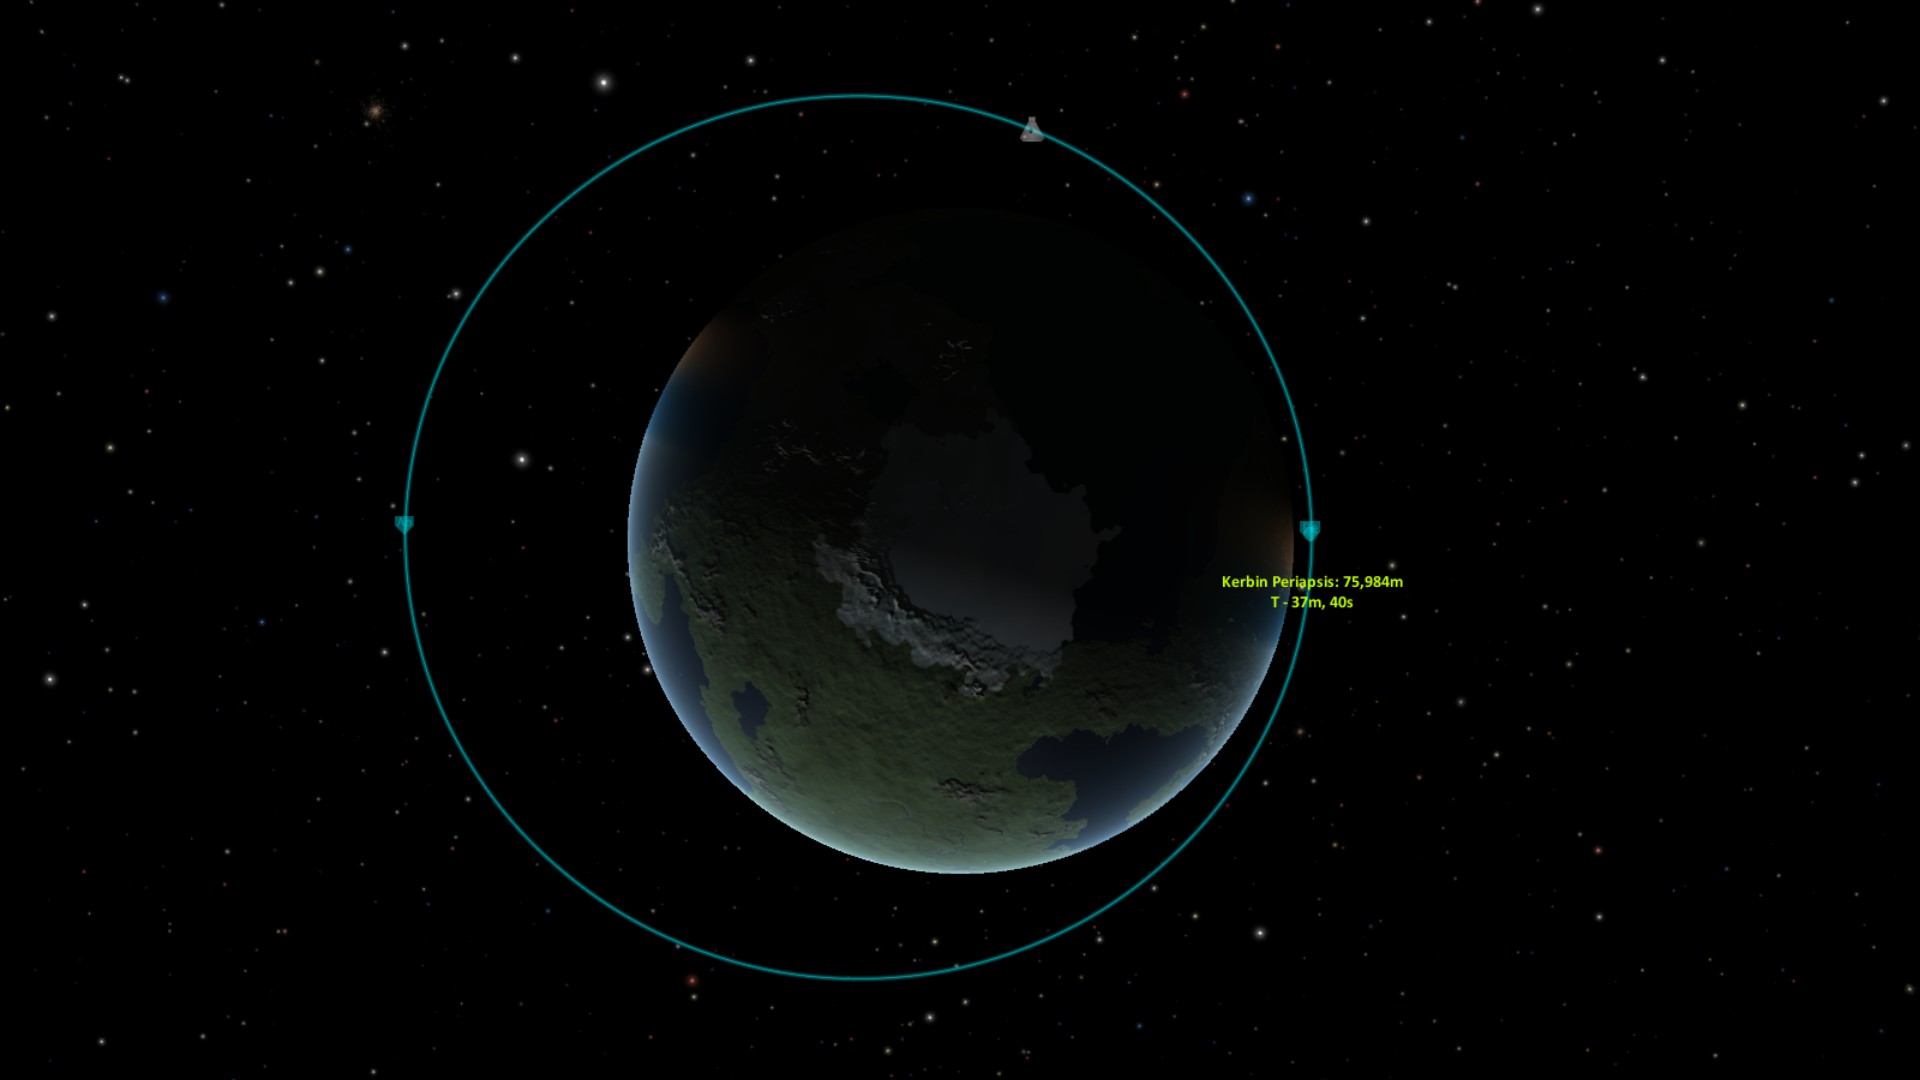
This is your periapsis
First off, you have two very important points in your orbit. In KSP, these are called the apoapsis and periapsis. The periapsis is the lowest point of your orbit, where you come the closest to the planet you are orbiting.
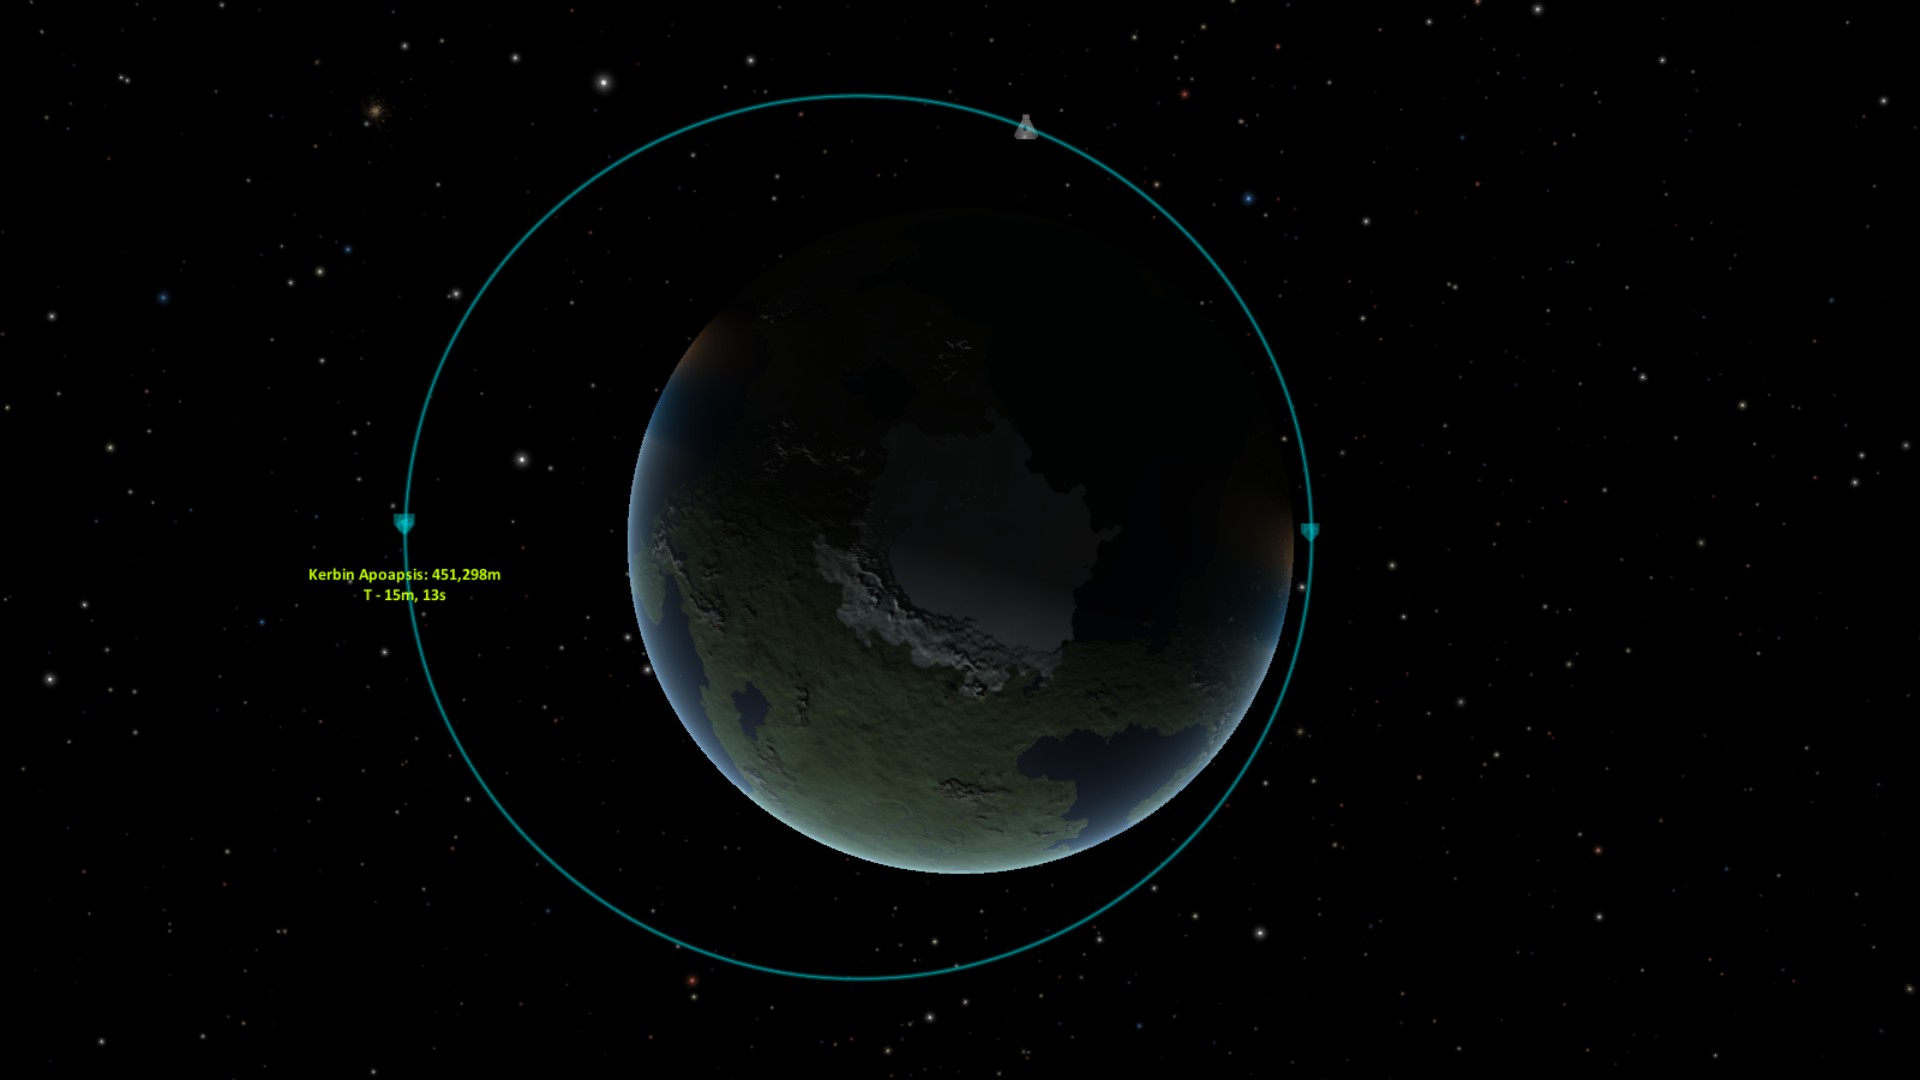
This is your apoapsis
The apoapsis is the highest point in your orbit, where you are the farthest from the planet you are orbiting. You should do your best to make all of your maneuvers at these two points, except for a special case that I will explain shortly. The more circular your orbit is, the less it matters when you make a maneuver. I like to aim for a solid 72,000 by 72,000 meter orbit, which I can nail to within a few hundred meters when I want to. Within 2-3 km is close enough though.
You will always be moving fastest at your periapsis, and there is also something called the "Oberth Effect" where the closer you are to a source of gravity, the more bang for your buck you can get out of your fuel. You essentially use the planet's gravity to speed you along. This becomes more pronounced the more delta-v you need to spend. For example, you will notice a bigger difference trying to get from Kerbin to Jool than you would from Kerbin to Eve or Duna.
You will always be moving slowest at your apoapsis. You should make maneuvers here for landing when you can. Sometimes you might want to land at a specific place, such as at the Kerbal Space Center. These special cases might mean you have to make your maneuver at some other point in your orbit. It’s best to use pretty much circular orbit in these cases.
Orbital Inclination
Sometimes, you need to change your orbital inclination. You have probably heard that the earth revolves at a slight tilt compared to its orbit, which is why we have regular summer and winter cycles. Sometimes, the United States, for example, is a little farther away from the sun, and South America and Africa get more direct sunlight. Imagine you launched a rocket so that it would always be over the same point on Earth. This rocket’s orbital inclination would match the tilt of the Earth.
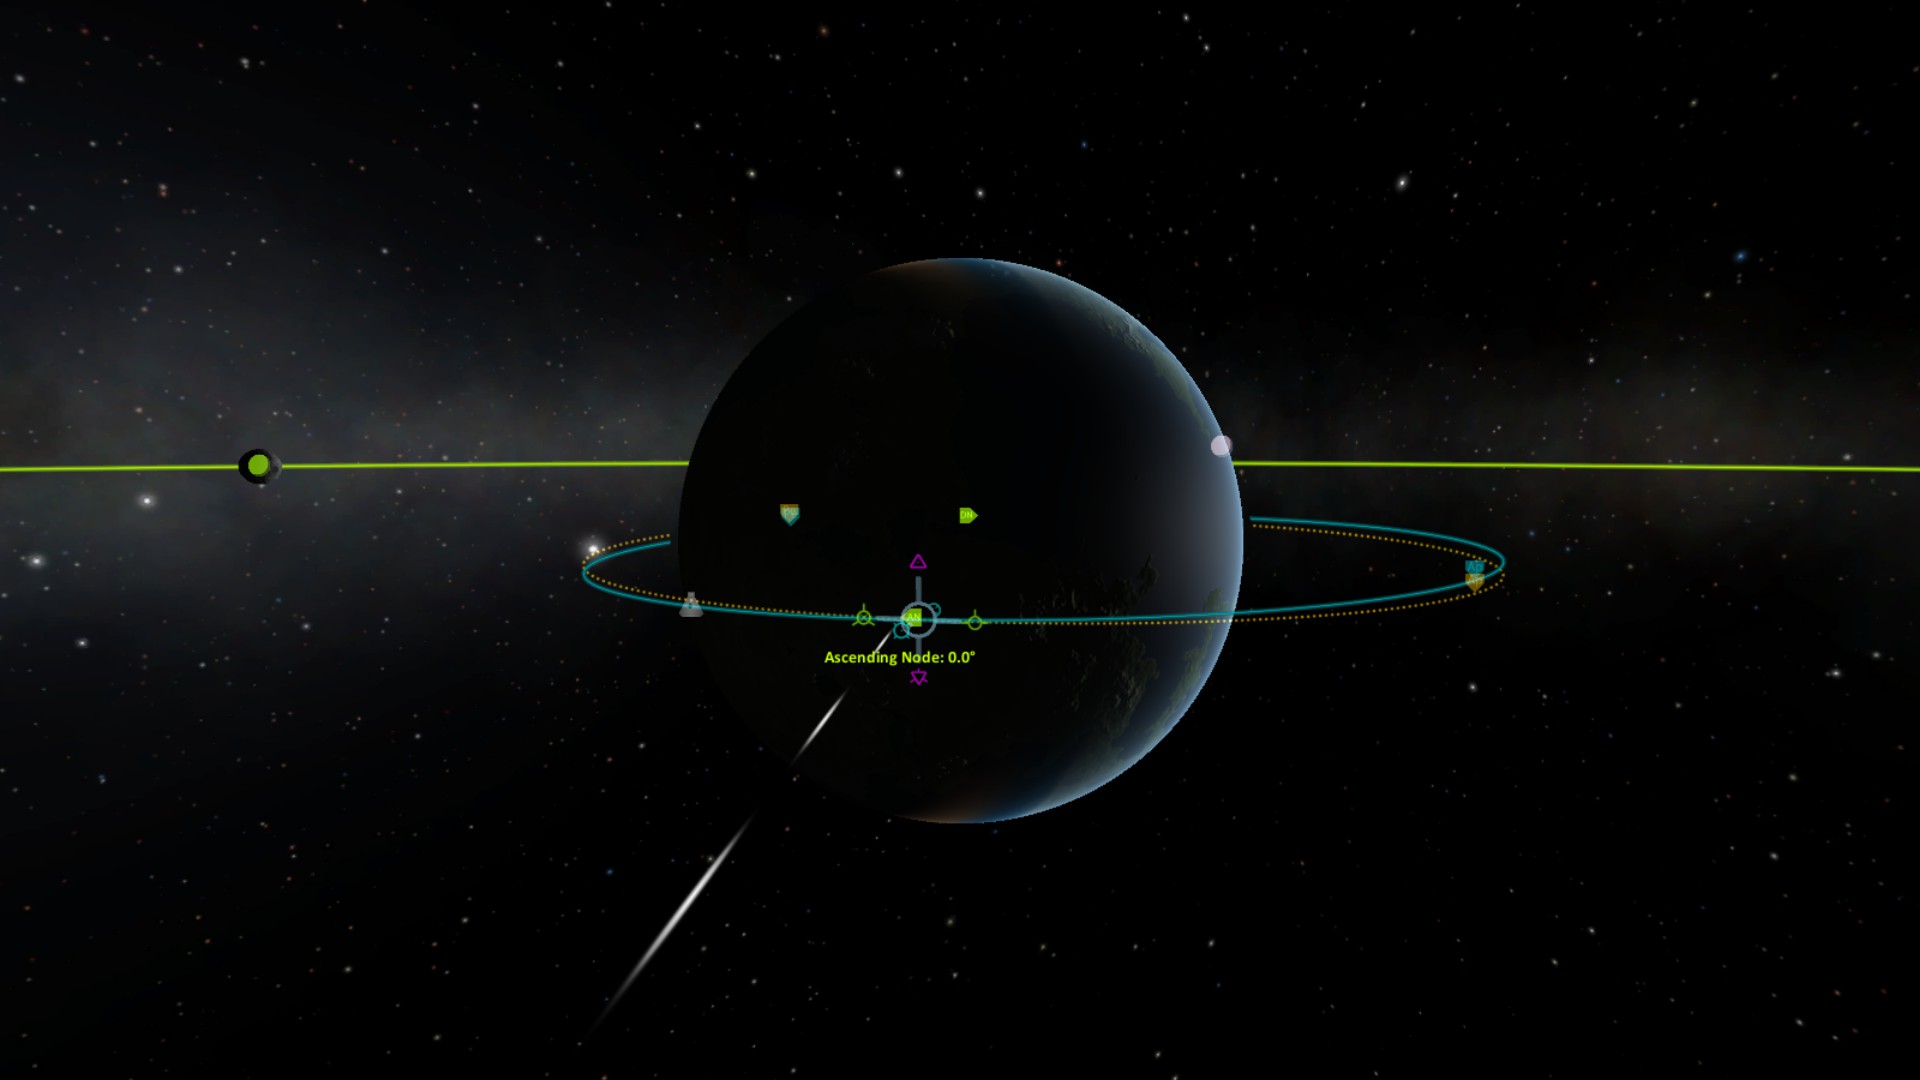
To change the angle of your orbit (your orbital inclination), you first will want to select a moon to match your orbit to. Right click on either Minmus or the Mun, and then select “set as target.” You will see two green numbers appear on the screen. These are “AN” and “DN” which mean “Ascending Node” and “Descending Node.”
Ascending Node Example
Each of these will have a number. One of them will have a positive number, and the other one a negative number. The north pole is considered the top of Kerbin, so a positive number means your orbit is closer to the north pole at that point that you want it to be. A negative number means you are farther from the north pole than you want to be.
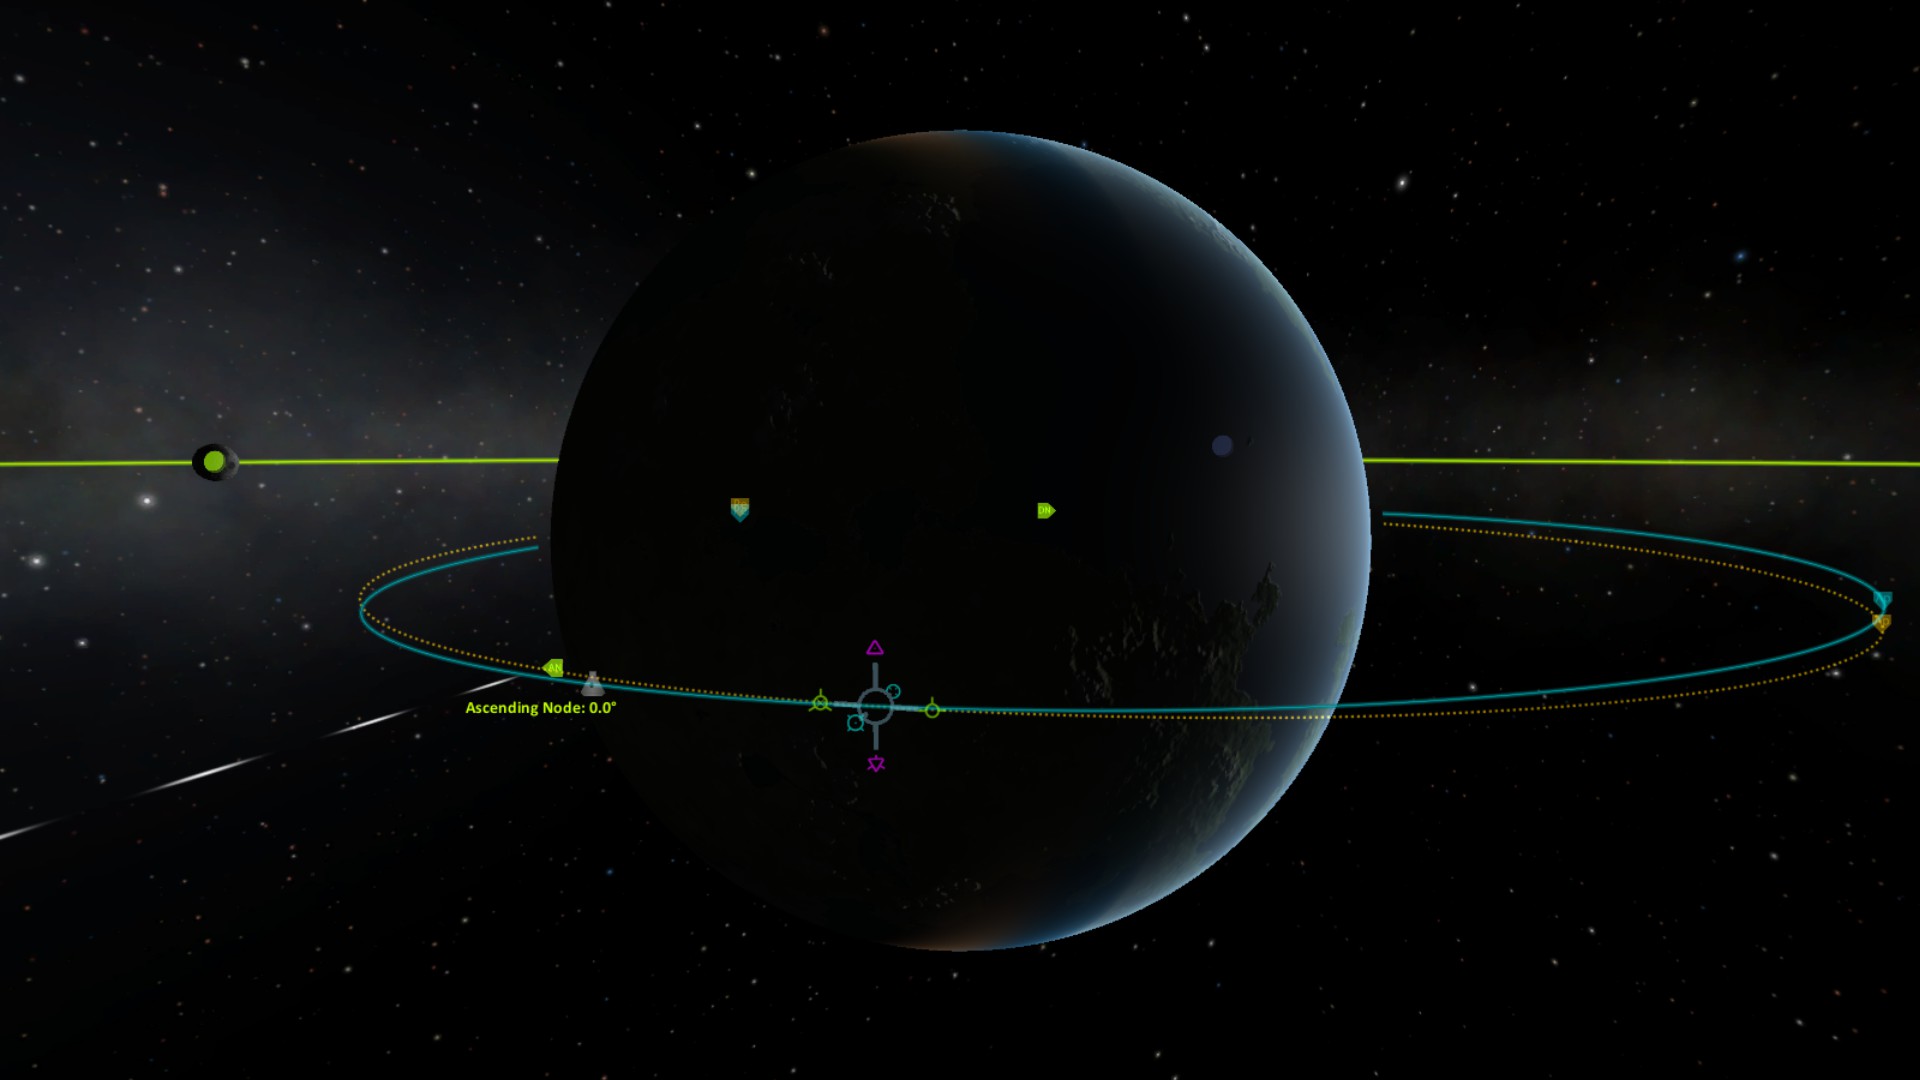
The ascending node is jumping away
When you are at the negative number (the Descending Node) you should turn your rocket to face straight north, and burn for a few seconds. Stay in map view and check to make sure that the number is getting closer to zero. You want this to get pretty low, ideally all the way to 0.0 degrees. The closer you are to the descending or ascending node when you make your maneuver, the more effective you will be at getting lined up. As the number gets very close to 0.0, you’ll notice it start to jump away from you. This is normal. Your best course of action is to stop the burn, and wait until you reach it again, then starting up your engines again very, very carefully.
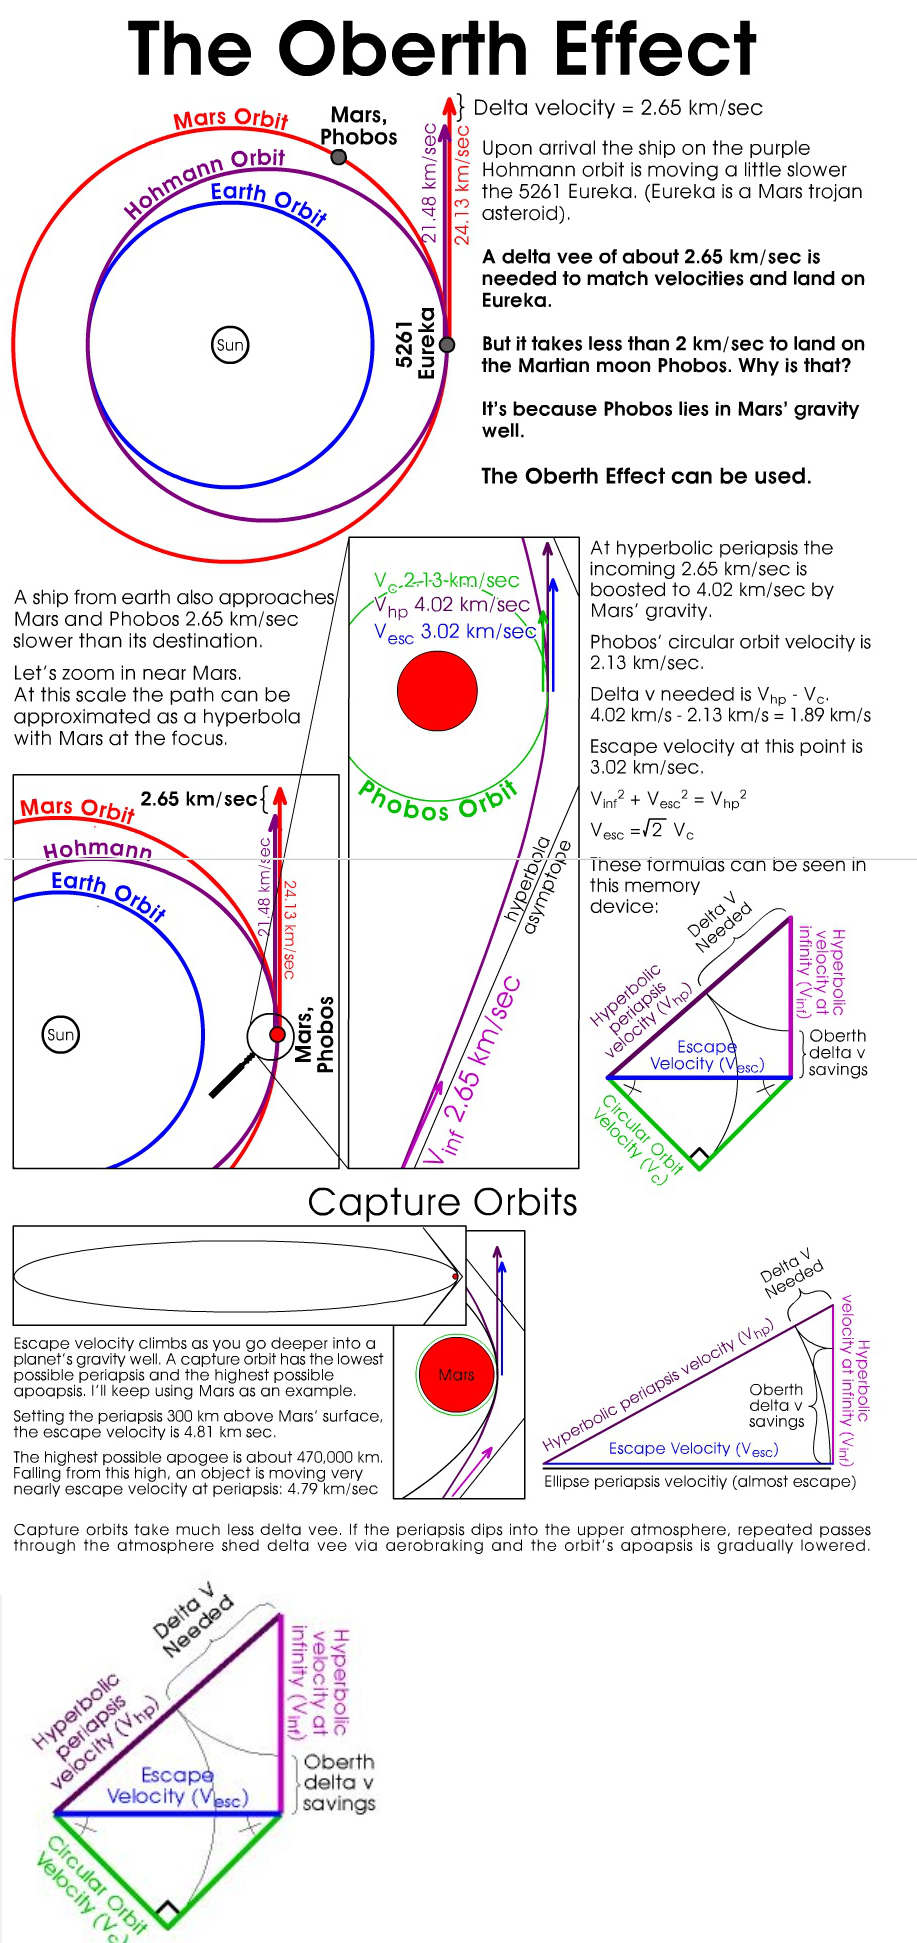
Oberth Effect
I took this data from http://clowder.net/hop/railroad/Oberth.html, where it was written in flash for some reason. Enjoy this now-jpg representation of how the Oberth Effect works.