Now that you’ve made a rocket and you know how to fly it reasonably well, let’s go to the Vehicle Assembly Building again and build a more advanced rocket. There are some neat tools available in here that let you have a lot more control over how you place parts, and that allow you to see different stats about your craft.
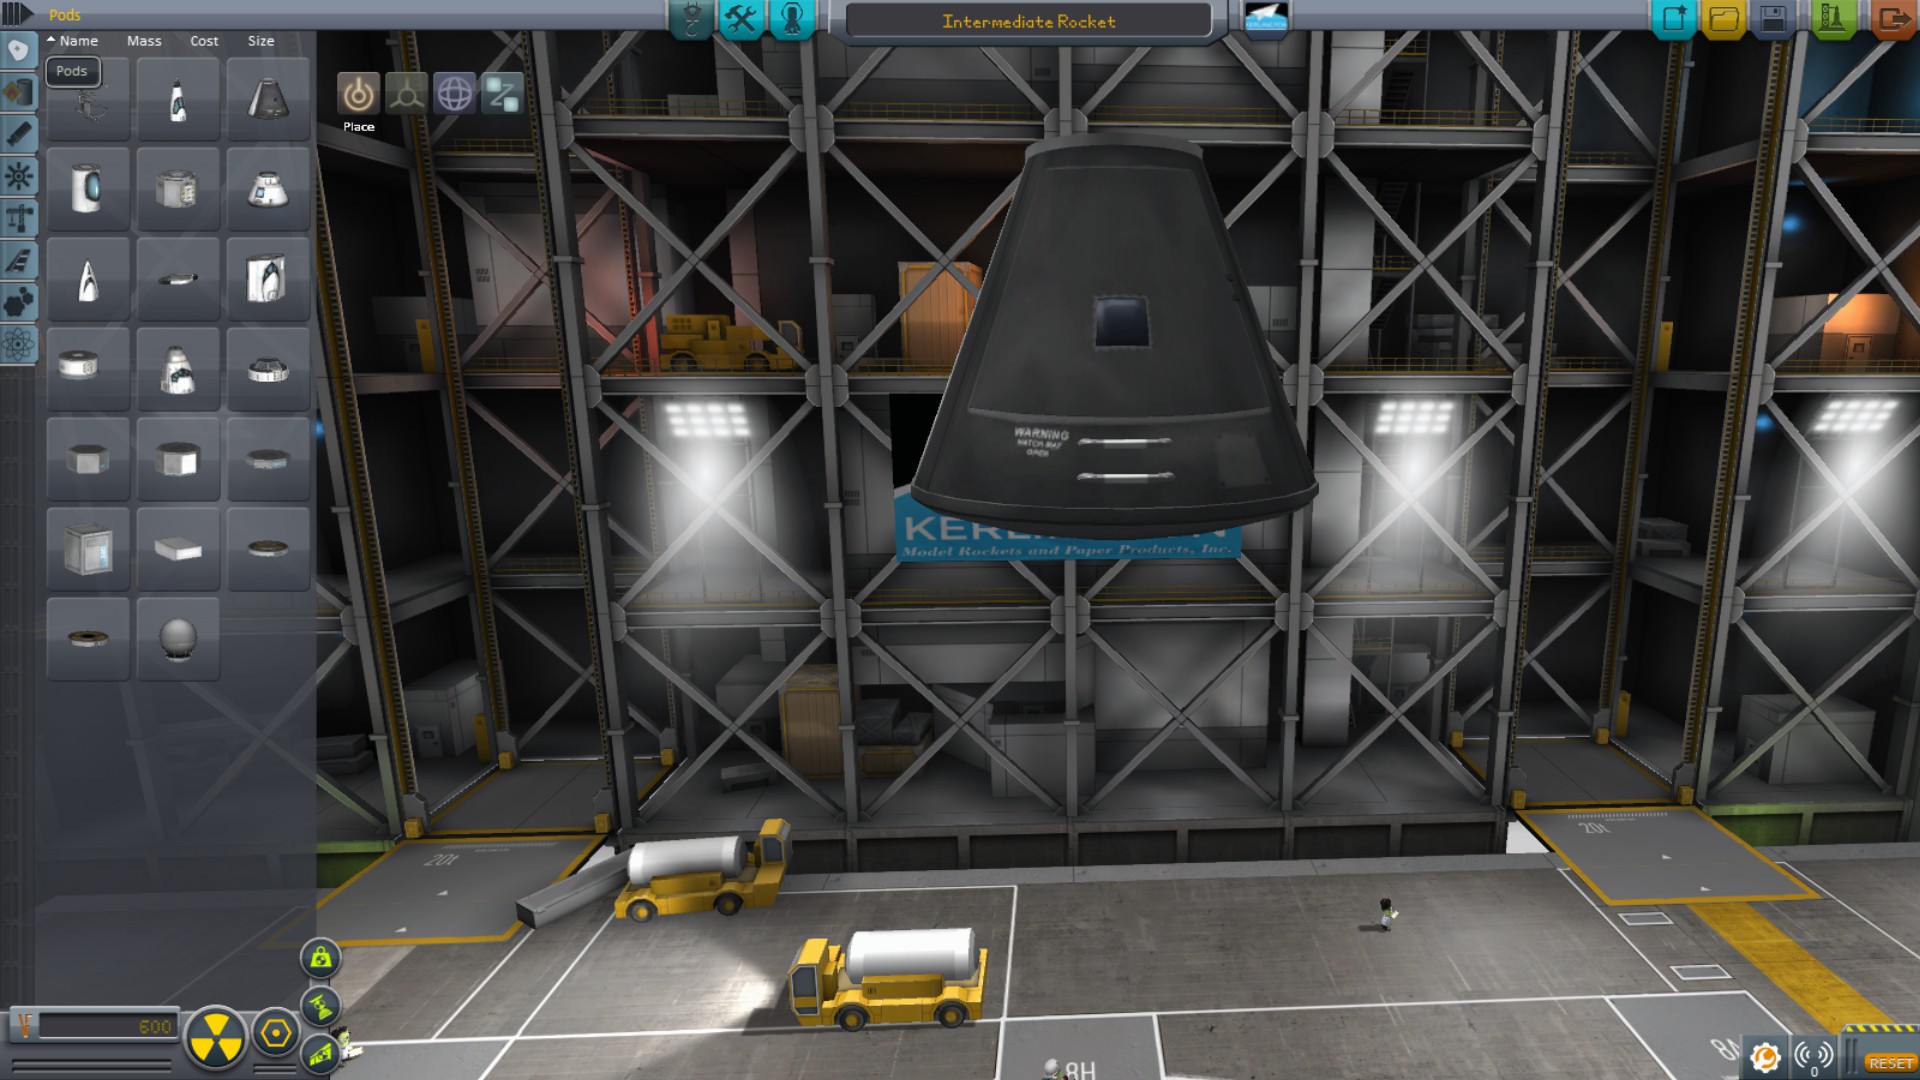
Select the Mk1 Command Pod
First, let’s talk about the parts organization. You’ll notice that there are 8 tabs on the left edge of the screen. These contain different types of parts. The first one is the Pods tab, and contains (you guessed it) command pods (things that let you fly the rocket). Usually these are the first thing you place. That way your craft will exist for as long as your command pod exists. In other words, you’ll be able to control it and (hopefully) safely land it even if all you have left is a parachute and the pod with your Kerbals on board.
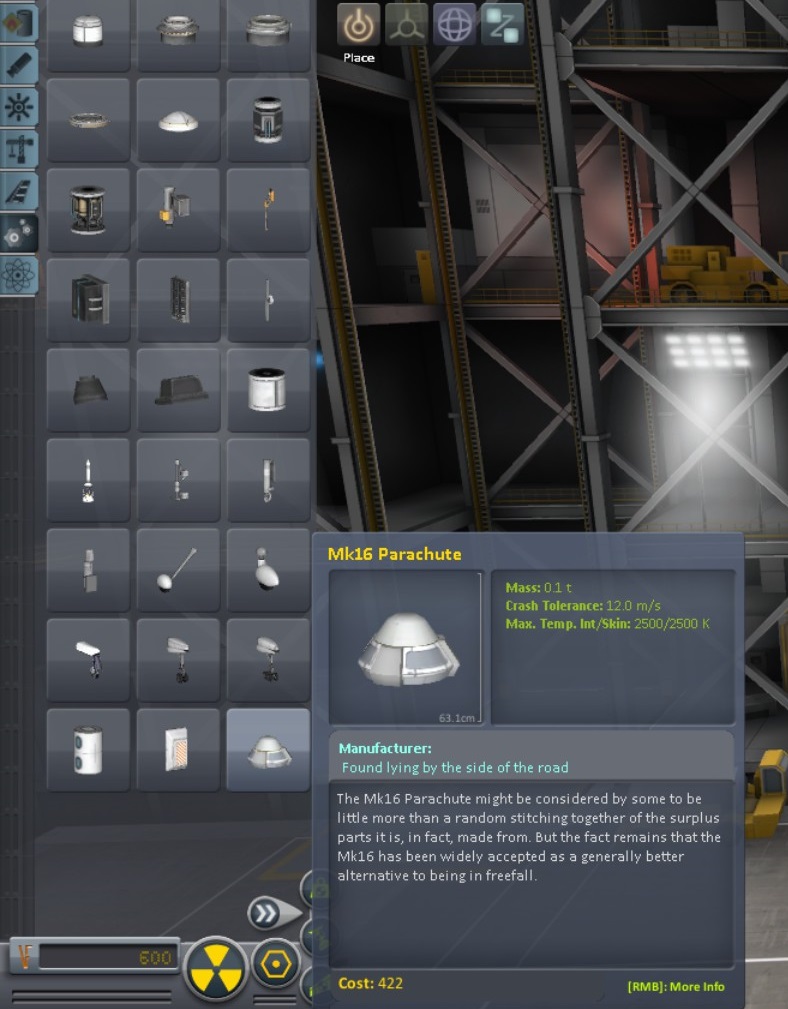
You should probably add a parachute before you forget.
Next, the smartest thing to place is a parachute, found under the "utility" tab. If I have a manned vessel, I usually like to add a probe core as well so that I can control it if there are no Kerbals on board. Make sure you have enough parachutes to slow your craft down to less than 7 m/s. The command pods can typically survive up to about that speed. Less is usually better, but can get a little annoying after a point. Note that the amount of parachutes you’ll need depends on what planet you plan on landing your vessel on. Also, not all planets and only one moon have atmospheres. That moon is a late-game destination called Laythe.
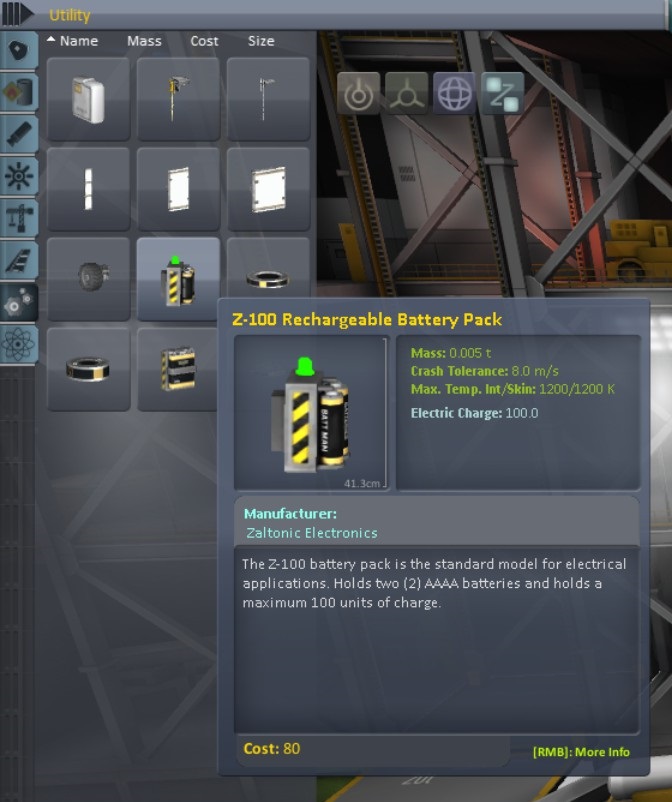
Batteries are often a good idea. Just make sure you don't block the door.
Consider adding some batteries to the sides of the command pod, and possibly some solar panels. These are in the "utility" section. Be careful not to block the door. You might want to test that the door can be opened before moving on. Put the rocket on the launch pad as it is, and see if you can get your Kerbal in and out. If you can, then success! You can move on. Pause the game (ESC), and then click "Return to Vehicle Assembly Building."
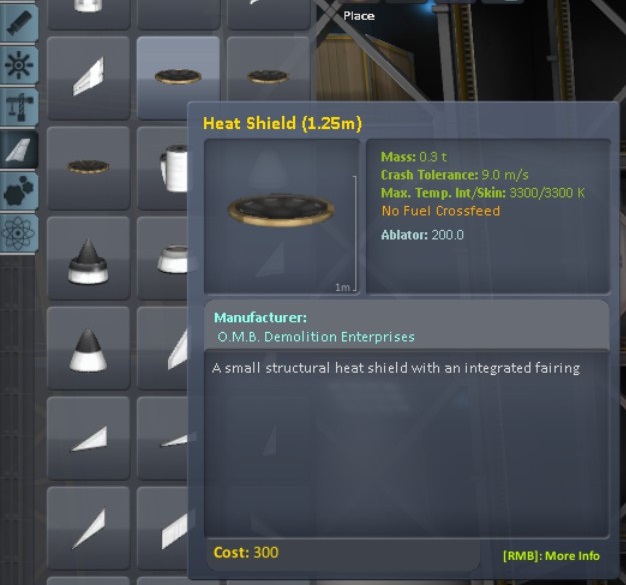
Consider adding a heat shield.
A heat shield goes next, but if you’re dropping in from Kerbin orbit, they aren’t necessary and usually just add extra weight. The heat shields are in the "aerodynamics" tab that looks like a wing. It’s the third from the bottom. Heat shields may be helpful for returning from Minmus orbit, but anything less than that should be survivable without one.
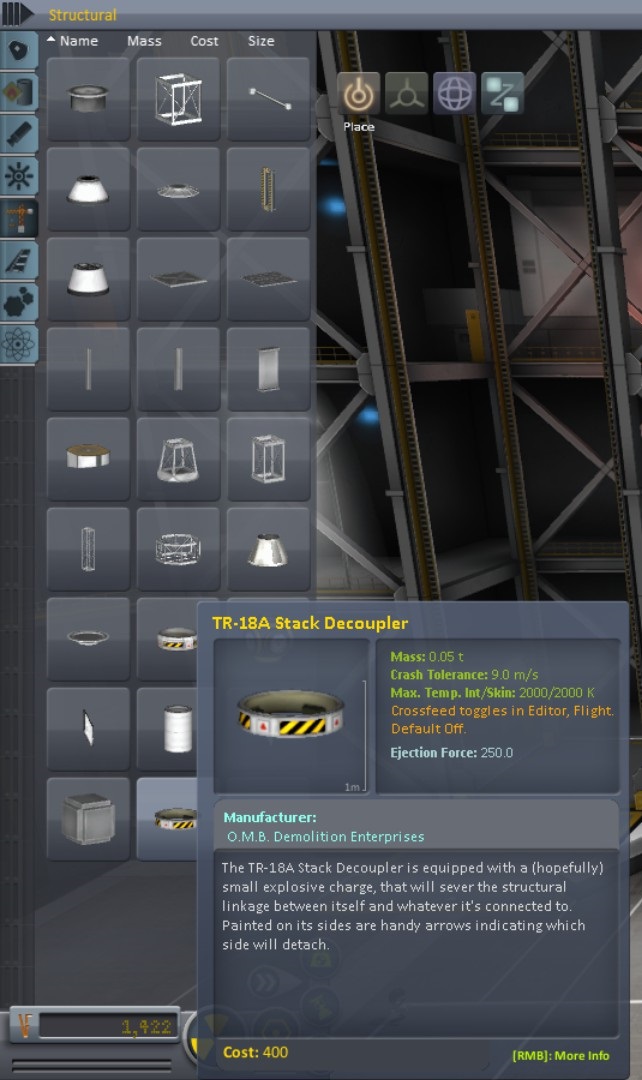
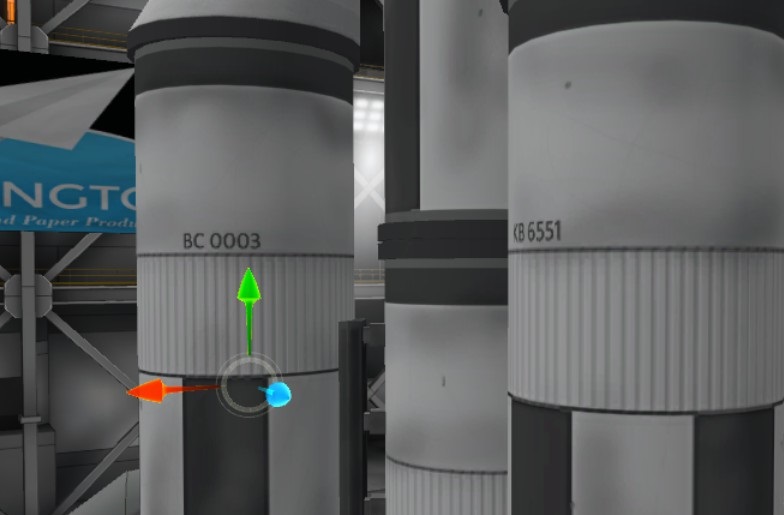
You definitely want a decoupler next.
Whether you have a heat shield or not, a decoupler is a smart choice to go between your pod and whatever comes after it. Decouplers are in the "structural" section.
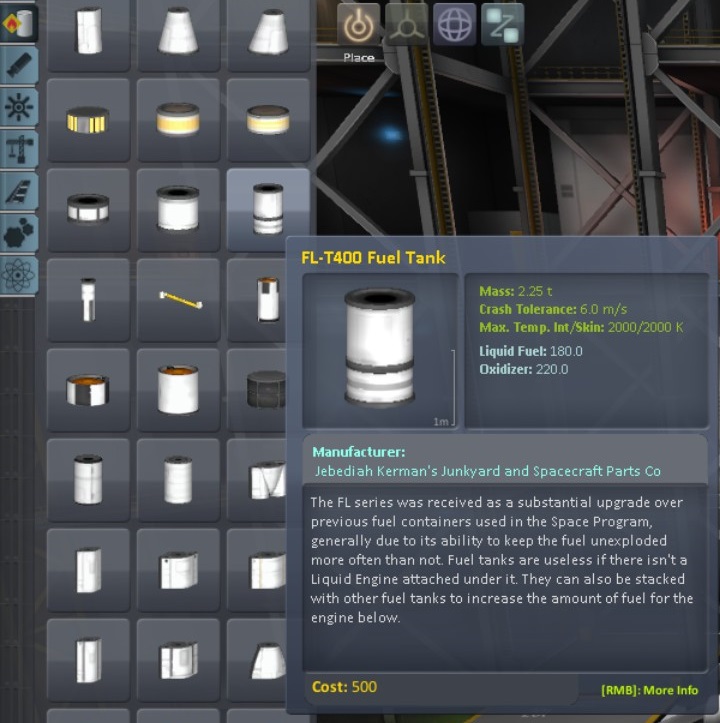
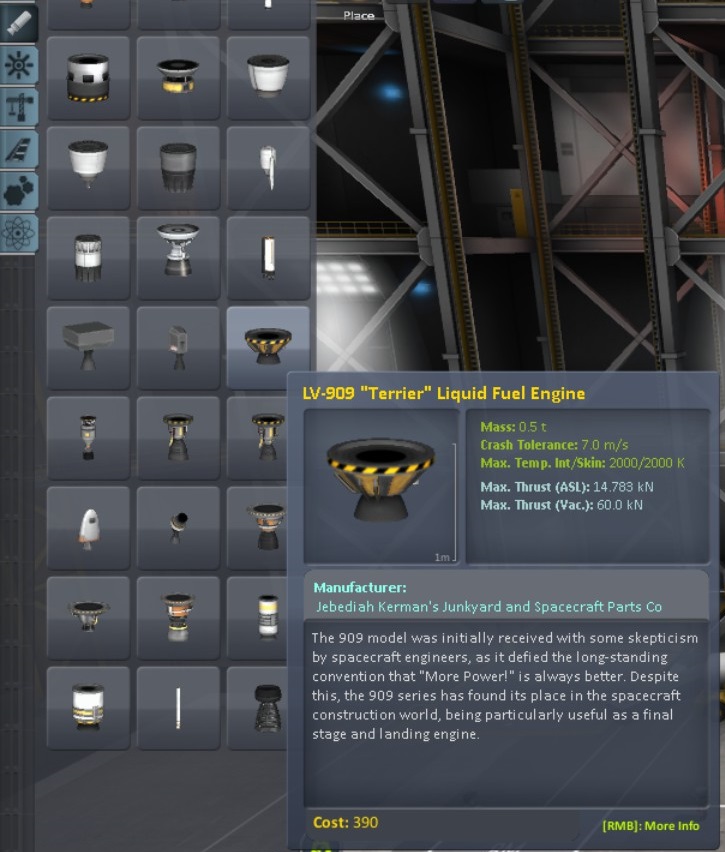
Select a fuel tank and put an engine under it.
Next you’ll want some fuel tanks and an engine. For now, just add 1 FL-T400 tank. Stick an LV-909 engine under that. From the top, fuel tanks are the second tab. Engines are the third. You’ll probably want more fuel, but this is a starting point for now. Suffice to say, if you have enough fuel and your engine can lift that fuel, you could get to orbit. This stage won’t have anywhere near enough fuel for orbit right now.
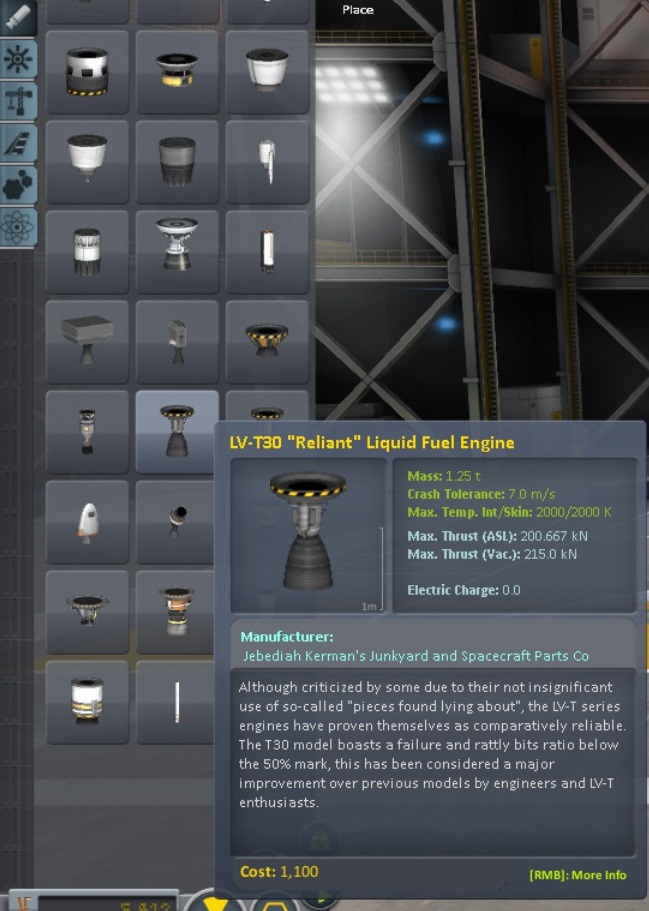
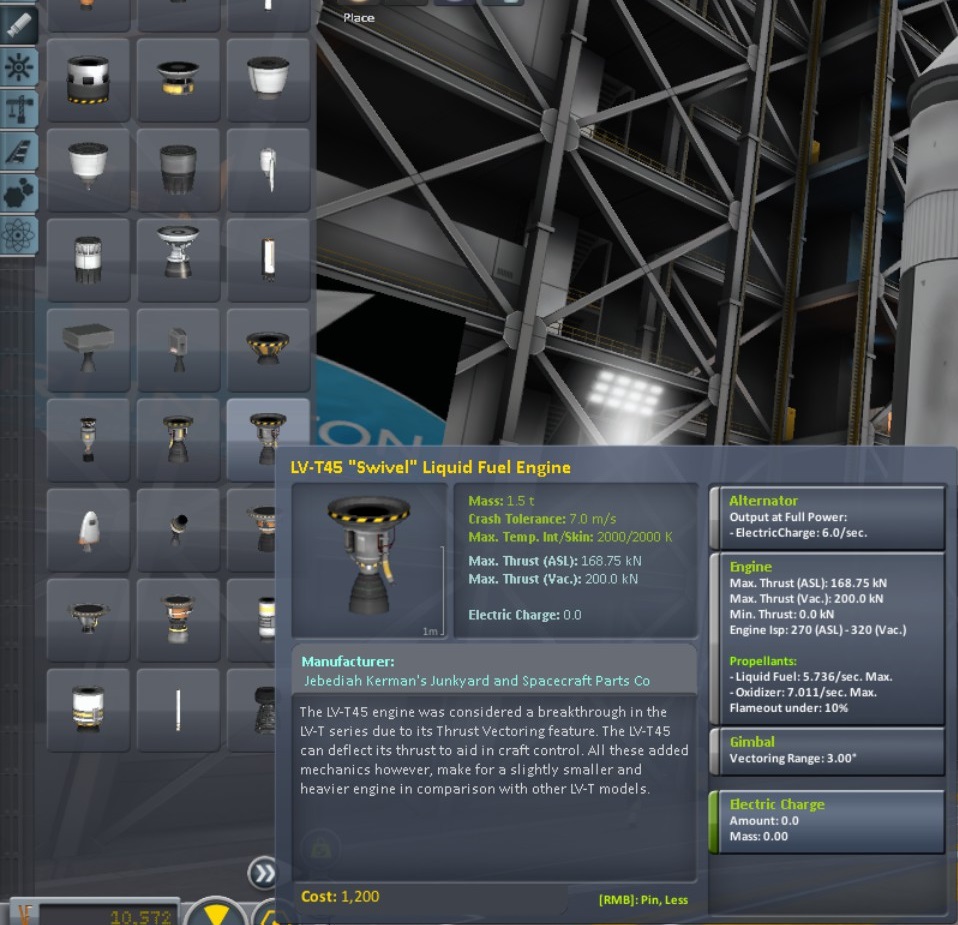
Try using 2 of the FL-T800 fuel tanks, followed by an LV-T30 Reliant engine.
After the first set of fuel tanks/ engine, you need another decoupler. Otherwise, that stage you just placed is useless. Now you’re ready to place another stage. This one should be a little larger, since you’re trying to lift yourself off of Kerbin’s surface with it. Try placing 2 of the LT-800 tanks followed by an LV-T30 tank for now. We’ll get more in depth with this later.
Add fins at the bottom of your rocket. Using a radial stage can help keep fins at the bottom, while still having fins on the two lowest stages.
One final booster stage might be helpful at times. After that final booster, add some fins. In fact, consider adding fins to the lowest 2 stages if you added an optional booster. Anything that you expect to be used in the atmosphere should have fins. Make then progressively larger the farther down the rocket you go.
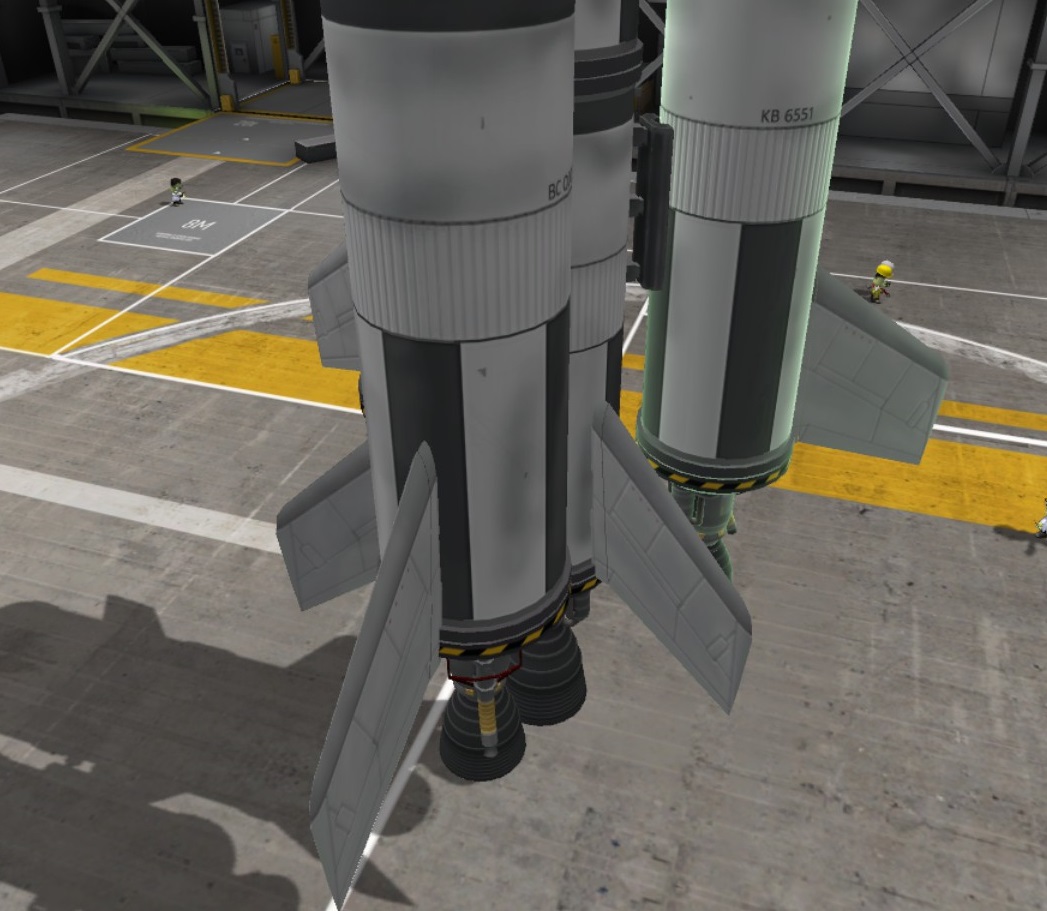
Adding in the rest of the radial booster stage. I used:
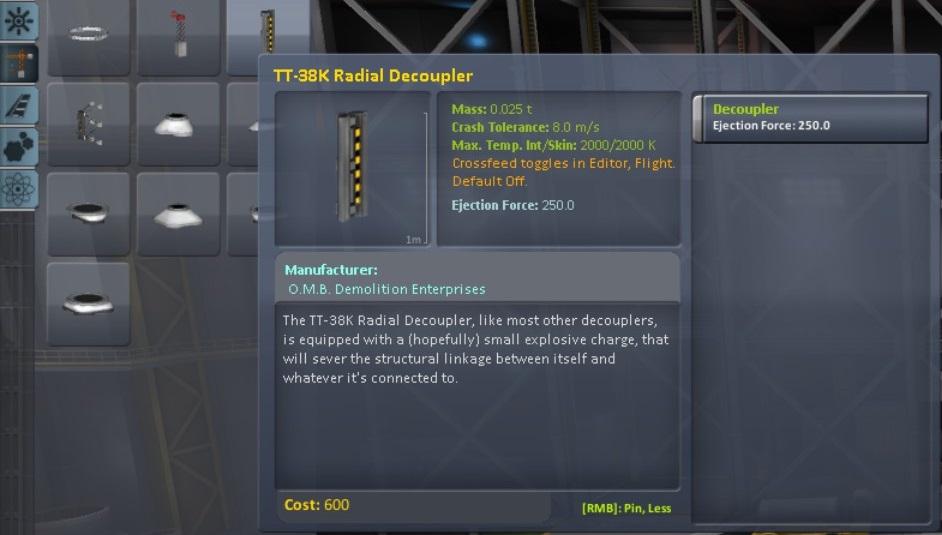
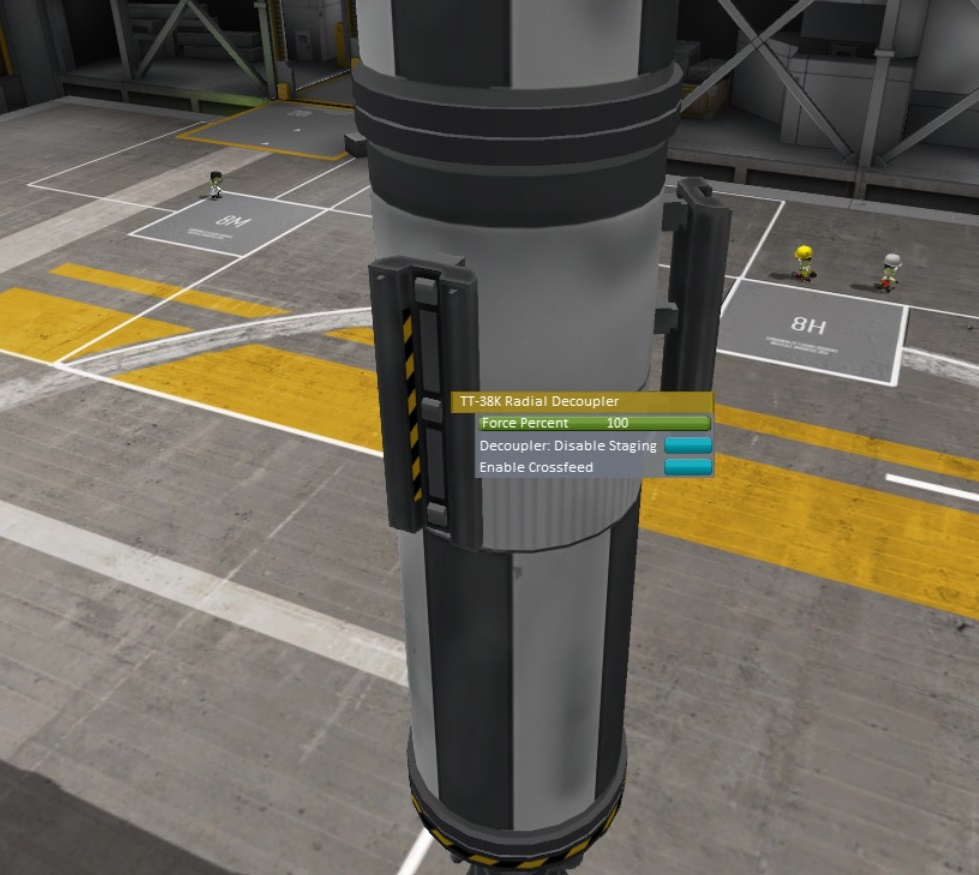
3 Radial Decouplers
1 FL-T800 tank on each decoupler
An LV-T45 Swivel under each radially attached tank
A slanted nosecone on top of each radial tank, with the nose pointed inward.
Fins on both the radial stage, and at the bottom of the stage before it. They all ended up well below the center of mass, which is great.
If you need to, you can use anything from prior lessons to modify your rocket. I recommend looking at VAB Basics.
Here’s a simple checklist of what to put on your rocket when:
Part
Place...
Found under...
1. Command Pod
As the first part of your rocket
The "pods" tab (top tab)
2. Parachute
On your command pod. (Careful not to block the doors.)
The "utility" tab (looks like gears)
3. Batteries, solar panels
On your command pod
The "utility" tab
4. Heat Shield (sometimes optional)
Under your command pod
The "aerodynamics" tab
5. Decoupler
Under your command pod
The "structural" tab
6. Booster (fuel tank(s) and engine)
Under the decoupler
Tanks are under "fuel tanks" and engines are under "engines"
7. Decoupler
Under your booster
The "structural" tab
8. Next booster
Under the decoupler
Tanks are under "fuel tanks" and engines are under "engines"
9. smaller fins
As low on your booster as possible
The "aerodynamics" tab
10. Decoupler
Under the booster from step 8
The "structural" tab
11. Booster
Under the decoupler
Tanks are under "fuel tanks" and engines are under "engines"
12. Larger fins
As low on the booster from step 11 as possible.
The "aerodynamics" tab
13. Continue pattern as needed
Using the VAB
There are a lot more neat tools in the VAB than I've mentioned so far. These allow you to relatively easily create exactly the rocket you want to make.
There's an option in the VAB for advanced sorting. This section is also how you make subassemblies.
Sorting
If you click on the advanced tab at the top of the screen (it looks like it’s just a graphic and not a button), you’ll open an extra tab that lets you sort your parts in lots of neat ways. You can look through there from time to time, but it’s often not necessary. I virtually never touch that option. If you want to make subassemblies and place them in your rocket, this is how. These will be useful later on if you ever choose to build standard rockets for different uses.
You can sort your parts within a tab by mass, name, cost, or size. I usually leave the default sort, but size seems like a great way to more easily group together the parts you’re trying to build with.
Angle Snap is great for lining things up.
Part Positioning
You have a few ways you can change the way a part will be placed on your rocket. First, you can just be careful about where you initially place it. This works better if you turn on the angle snap feature with "c" (you should see a yellow polygon rather than a circle in the bottom left of the window)
You can place multiple parts at once that will be automatically aligned. Options include radial alignment up to 8 parts, or mirrored alignment up to 2 parts.
You can also use either "x" or click on the visual display of it to change how many parts are placed at a time. This visual button is right next to the snap style indicator (the polygon or circle). If you press "r" you’ll cycle between radial and symmetrical alignment of parts. Radial is great for rockets. Symmetrical is for aircraft and some special case uses. Symmetrical snap can only place up to 2 parts at once.
You can also use WASDQE to rotate your parts. If you hold shift+W, etc., you’ll rotate it just a little bit. This can be very useful if you want to have angled solar panels, ladders, or for more complex vehicles, such as aircraft.
Build Modes: place, offset, rotate, and root.
Once you’ve placed your parts, you can also change how they are positioned without picking them up by changing your mode. Once you’ve placed your first part, you’ll see these options pop up on the screen to the right of the part selection pane. You can switch between "place" (the default), "offset," "rotate," and "root." I don’t know how to use root effectively, but the other three are straightforward. Note that with all of these modes that I’m describing, using the angle snap will make you go in small, finite increments. In other words, you can’t just place at any random angle unless you turn off angle snap, nor can you offset by any random distance.
Place allows you to place parts freely. There isn’t much to explain because this is the most used mode, and you’ll figure it out in a few minutes if you mess around. Click on a part in the part selection window (don’t hold) and then click again when you have the part where you want it. If it’s lit up with a greenish coloring, it’s in a good spot that can be placed. This does not mean anything about the usefulness of placing it there.
Use offset to offset parts in one direction at a time.
Offset is fairly self-explanatory as well. Click on the option, then you’re in offset mode. You can’t place new parts, but when you click on a part you’ve already placed, you can move it around. This is great for if you want to move your fins as far back as possible, or if you need to stick an engine inside of a fuel tank partially for some reason (there are some edge cases where this can be a very powerful tool, if not entirely realistic).
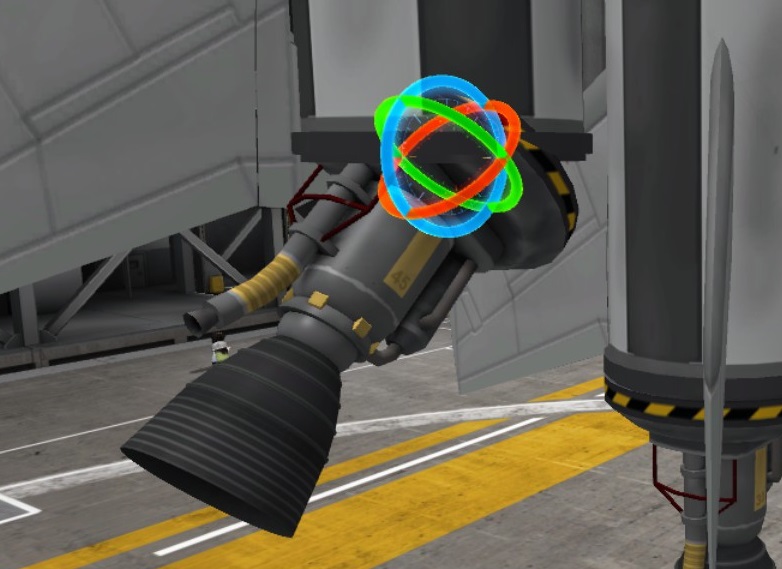
Use rotate to tilt things to weird angles, or even to flip them 45/90/180 degrees.
Rotate is a great tool. Just like offset, click on the option to enter rotate mode. Then, click on a part and you’ll see 3 different colored wheels that straddle the x, y, and z axes. Click and drag on any of these to rotate that part about that axis. For example, clicking on the green one will spin the part around without flipping it (the top will stay firmly at the top)
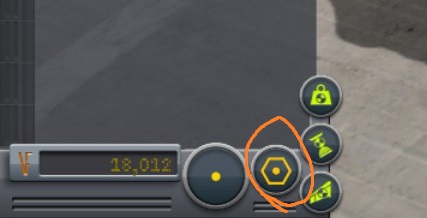
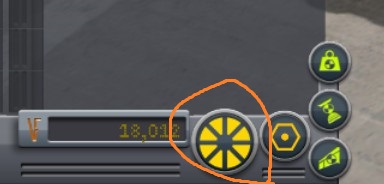
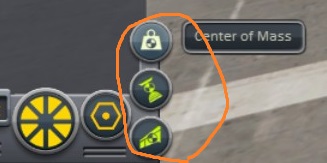
You should pay attention to Center of Lift, Center of Mass, and Center of Thrust. In your game, click the icons I circled.
Forces
There are 3 different craft stats that are very important to making sure your vehicle is stable. These are center of thrust, center of lift, and center of mass. These can be displayed by clicking on the three vertically aligned buttons at the bottom of the part selection pane. They look like an engine, a wing, and an old style weight respectively (trapezoid). Each has a black and clear checkered circle in its center, with 4 total sections to the checker pattern (4 squares that have their outer edges cut out to form a circle). The clear portion matches the color of the object shown.
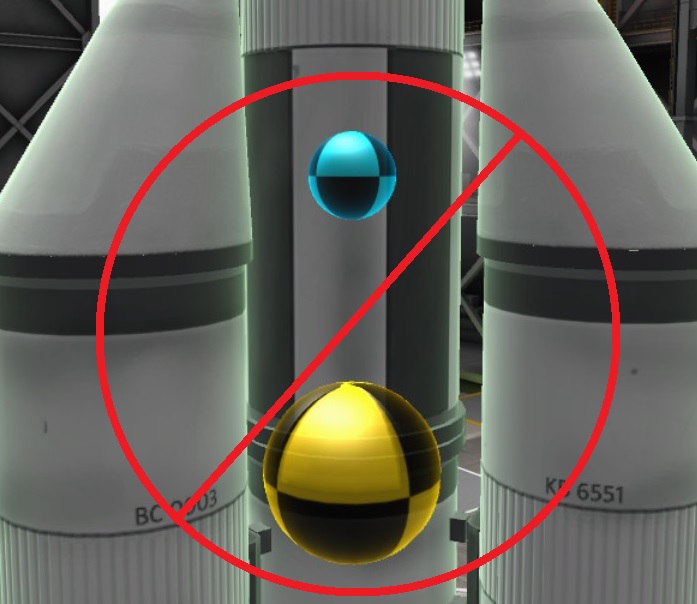
Always line up your Center of Thrust with your Center of Mass. The picture is exactly what you don't want.
Make sure that the center of mass (CoM) is perfectly aligned with the center of thrust. If your rocket is fairly large, this can be barely misaligned (such as having a goo canister on one side but not another), but should still be so close as to be negligible. Usually this means placing all parts using the radial symmetry tool. If you can find a way to bring this closer to the front of the craft, it will be a little more stable on ascent due to cool stuff with aerodynamics.
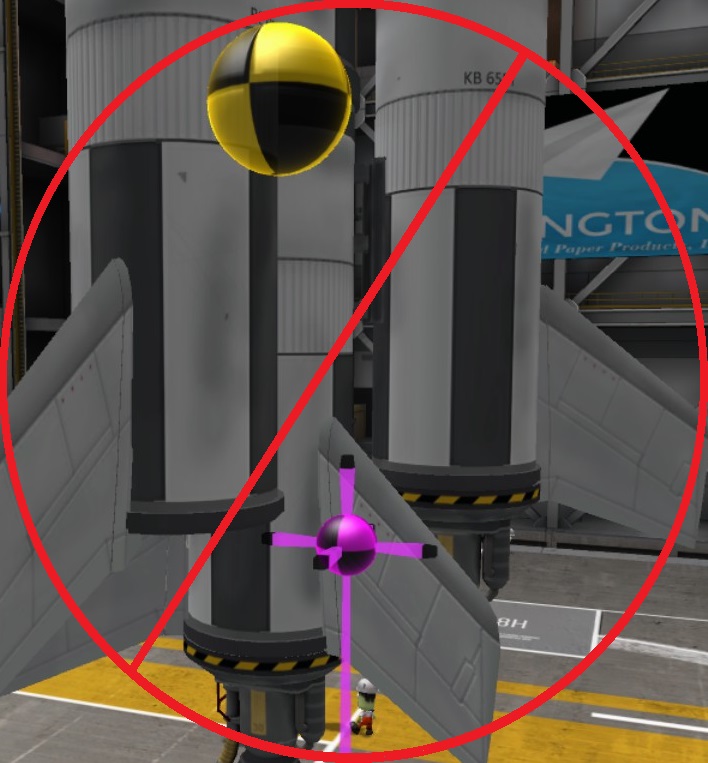
This is exactly what you should avoid with your Center of Lift. Your rocket will flip at the slightest tilt.
The center of lift (CoL) must always be behind the center of mass. The only exception is very advanced building techniques using a ton of SAS that I won’t cover. If the center of lift ever gets in front of the center of mass, you’ll end up with a rocket that wants to flip the other way around. This means you won’t be able to get moving very fast in atmosphere, and therefore probably won’t make it to space. I recommend right clicking on fuel tanks and draining the tanks with the Center of Lift and Center of Mass displayed to check that the center of lift stays firmly behind the center of mass.
You can drag these around to make sure your rocket executes different things in the right order, at the right time.
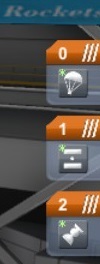
Stage Ordering
You can change what parts are in which stage in the VAB (and also on the launch pad or during flight) using the stack of stages on the right of the screen. You’ll see it on the left if you’re flight or on the launch pad. Simply drag a part to another stage. If you need a new one, simply click on the + to add a new stage. Usually, emptying a stage removes it from existence. If you need to though, you can use the – to remove a stage. To move multiple parts that were placed at the same time using the radial or symmetrical alignment tool, you’ll need to click to select the stack, then click and drag that stack to its new home.
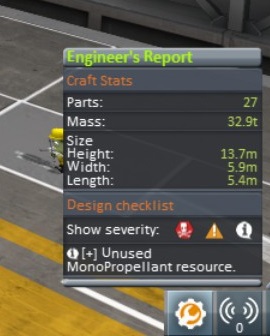
Use the Engineer's Report to make sure nothing is obviously wrong with your rocket, and to check delta-v readouts (as explained in the next section, "Orbital Mechanics").
Engineer's Report
This is the last really useful feature that I’m going to mention. If you look to the bottom right of the screen, you’ll see an icon that looks like a white gear with a wrench inside of it, with orange surrounding the wrench. Click on this.
You should see how heavy your vessel is, the rocket’s length, width, and height, and other useful stats. The only thing missing is a dry vs. wet mass indicator, which is useful for calculating how far your rocket can go. I’ll cover this in Advanced Rockets. If you scroll down in this little menu, you’ll see details on anything wrong with your rocket. Take this with a grain of salt, but also know that you can use it to avoid making obvious mistakes.
Note that you can use docking ports as decouplers in a few circumstances without issues (noteably when building a space plane and docking a probe inside of a cargo bay). You can also safely place parachutes on any part of the stage that has your lander. Just be sure that the parachutes are actually attached to the right positon.